Introduction to DIY Earring Crafting
Creating your own earrings at home can be a delightful and rewarding hobby. Whether you’re looking to add a personal touch to your fashion, craft unique gifts for friends, or simply explore a new creative outlet, learning how to make earrings at home opens up a world of possibilities. The process is much simpler than you might think, even for beginners.
You don’t need extensive metalworking skills or a studio filled with expensive tools to get started. With a handful of basic materials and some simple tools, you can begin crafting beautiful earrings that reflect your style and creativity. In fact, the ease and accessibility of DIY earring projects make them an ideal starting point for those new to jewelry making.
The retrieved blog example highlights how the author overcame initial fears about making earrings, discovering that many earring projects are not as difficult as they first appear. Drawing inspiration from that, we’ll cover the essential tools and materials you need, provide step-by-step guidance on how to create your first pair of earrings, and offer ideas to inspire your designs. Each step will be explained in straightforward terms to make sure you start off on the right foot.
By the end of this introduction, you’ll have a clear understanding of what to expect from the world of DIY earring crafting. We’ll ensure you feel equipped and excited to embark on this creative journey. So let’s dive in and start unraveling the basics of making your own earrings at home!
Essential Tools for Earring Making
Crafting DIY earrings at home requires some basic tools. These tools help shape, cut, and finish your earring designs. They are easy to use and available at your local craft store or online. With the right tools, you can create professional-looking earrings right from your home. Let’s explore the essential tools every earring maker should have in their kit.
Choosing the Right Pliers
Pliers are a must for working with wire and metal. For earring making, you need two types: flat nose and round nose pliers. Flat nose pliers help you open and close jump rings and shape metal. Round nose pliers are for creating loops and curves in wire. Look for pliers with smooth jaws to prevent scratching your materials.
The Importance of a Reliable Wire Cutter
A wire cutter is another key tool. It cuts wire cleanly and precisely. You’ll need it for trimming wire to the right length. Make sure your wire cutter can get close to your work for neat cuts.
Different Types of Hole Punches
Hole punches let you add holes for attaching earring hooks. There are different types, for paper, leather, or metal. Select the hole punch that suits the materials you’re using.
Selecting Durable Jewelry Glue
Finally, you’ll need strong jewelry glue. It secures parts of your earrings that can’t be soldered or wired together. A glue like E-6000 or Aleene’s jewelry glue works well for many projects. Avoid using weaker glues, like Mod Podge, for attaching earring backs.
These tools form the foundation of your earring making kit. With them, you can start crafting various earring styles right away.
 Basic Materials Needed to Start Crafting Earrings
When diving into the world of DIY earring making, having the right materials is crucial. Getting started doesn’t require a lot. Here’s a list of the basic materials you should gather:
- Earring Wires or Hooks: These are the parts that go through the earlobes. You can choose from various styles like fish hooks, lever backs, or studs, depending on your design.
- Beads and Charms: These add personality to your earrings. Pick beads and charms that match your style or the theme you are aiming for. The possibilities are endless.
- Jewelry Wire: You’ll use this to add beads to the earrings or to create shapes. Different gauges are available, with thinner wires for delicate work and thicker ones for more structure.
- Jump Rings: These small metal rings connect parts of the earring. They’re essential for attaching charms or chains to the earring base.
- Earring Backs: For stud earrings, you’ll need earring backs to secure them in place. Make sure they fit snugly.
- Embellishments: Think sequins, feathers, or fabric. These can make your earrings stand out.
- Findings Kit: This contains a mix of the small components like clasps, headpins, and more. It’s helpful to have a variety on hand.
These materials are easy to find at craft stores or online. With these at your disposal, you can start experimenting with different earring designs. Make sure to keep your style and the occasion in mind when choosing materials. Happy crafting!
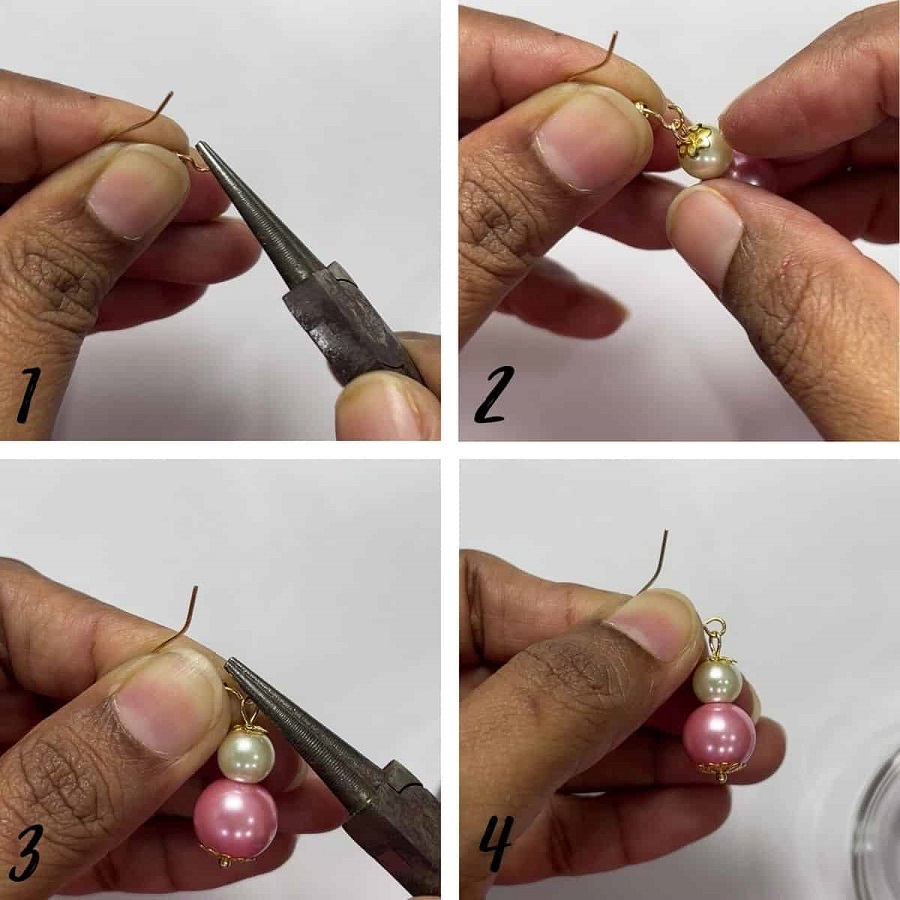 Step-by-Step Guide to Making Your First Pair of Earrings
Making your first pair of earrings at home can be exciting. Follow this simple step-by-step guide and you’ll be crafting beautiful pieces in no time.
Gather Your Tools and Materials
Start by collecting the tools and materials listed above. Ensure you have your pliers, wire cutters, hole punches, jewelry glue, earring wires or hooks, beads, and any other embellishments you desire. Arrange them on your workspace neatly.
Design Your Earring
Decide on a design for your earrings. Sketch out a rough idea if it helps. Choose beads and charms that fit your concept. Think about colors, shapes, and the length of your earrings.
Cut the Jewelry Wire
Using the wire cutters, snip a piece of jewelry wire to your desired length. Remember, it’s better to cut a bit extra as you can trim it later.
Shape the Wire
Take the round nose pliers and create loops or curves in your wire. This forms the basic structure of your earrings. Be gentle to avoid kinks.
Add Beads and Charms
Slide your chosen beads or charms onto the wire. Arrange them according to your design. Use the flat nose pliers to open jump rings if needed to attach charms.
Attach Earring Hooks
Once your design is in place, use the flat nose pliers to open the loop of the earring hook. Hook it onto the top of your earring and close the loop securely.
Secure Components with Glue
If you have pieces that need gluing, apply a small amount of jewelry glue. Press the parts together firmly. Give ample time for the glue to dry.
Final Adjustments
Inspect your earrings. Trim any excess wire and tighten all connections. Make sure the earring backs fit well if you’re making studs.
Repeat for the Second Earring
Repeat the process to make the second earring. Try to match it as closely as possible to the first one for a symmetrical pair.
And there you have it – your very own handmade pair of earrings! Wear them proudly or gift them to someone special. With practice, you’ll be able to make more intricate designs. Remember, the key to great DIY earrings is patience and creativity. Happy crafting!
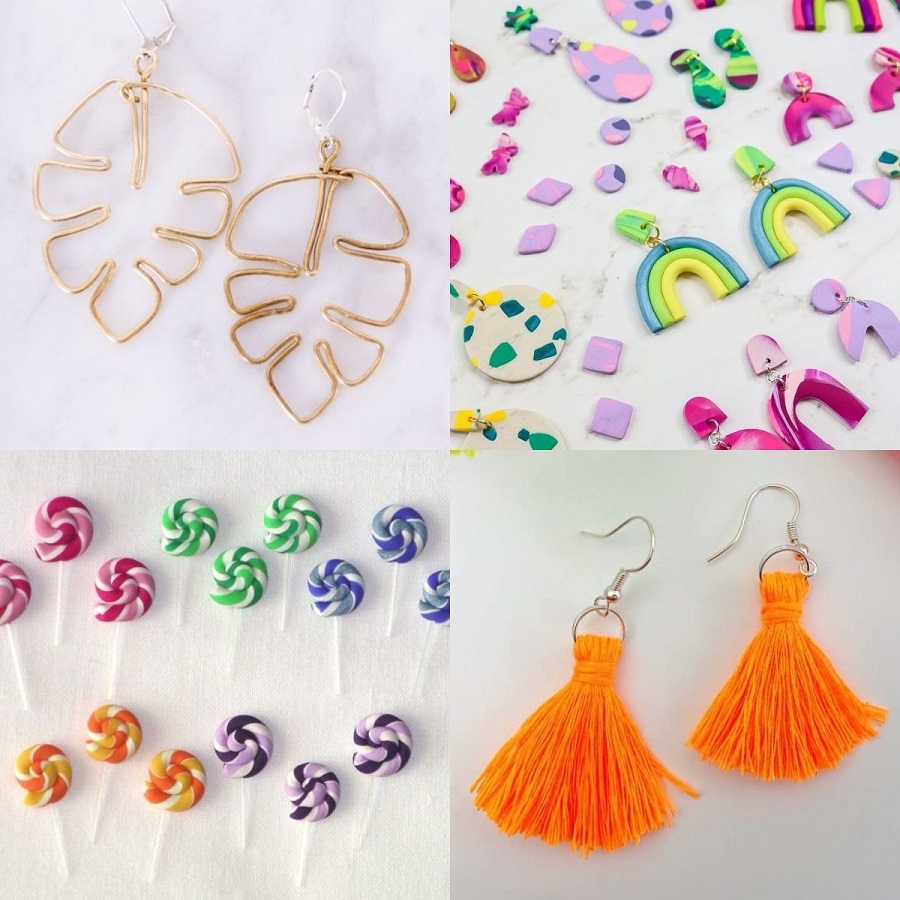
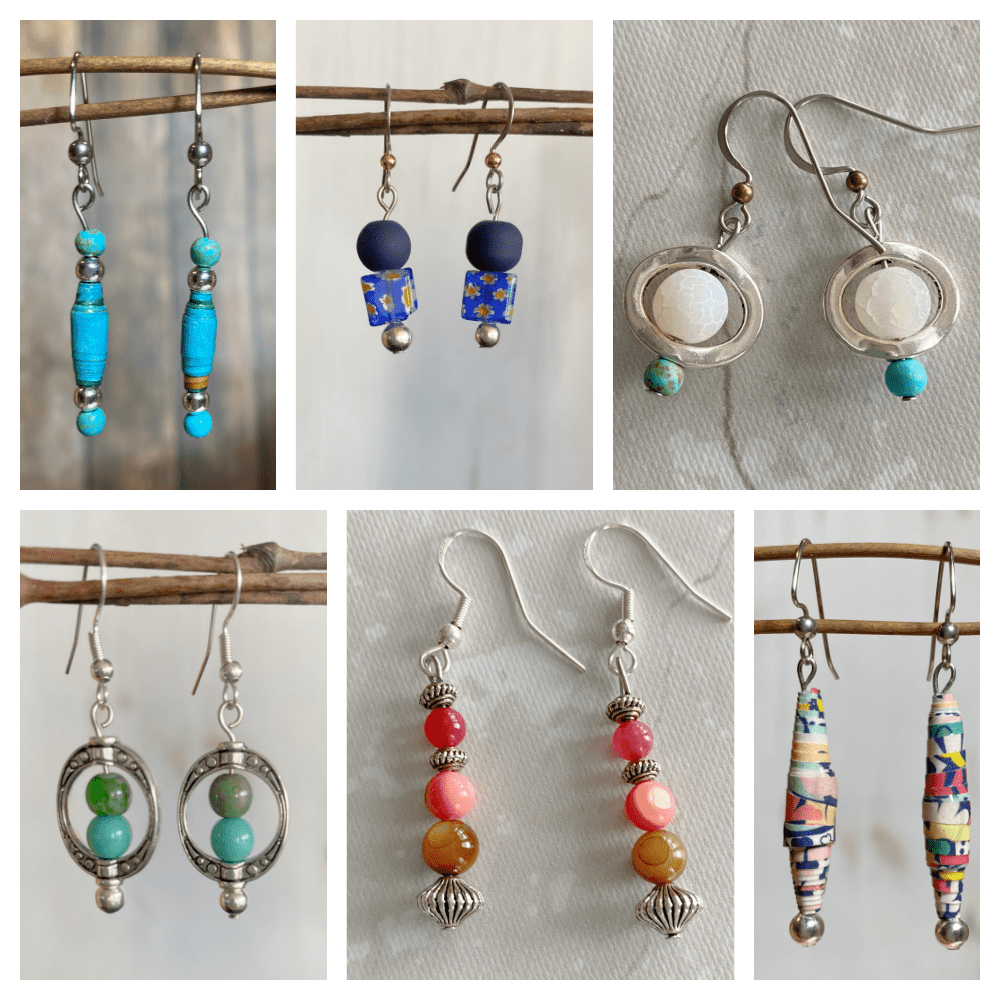
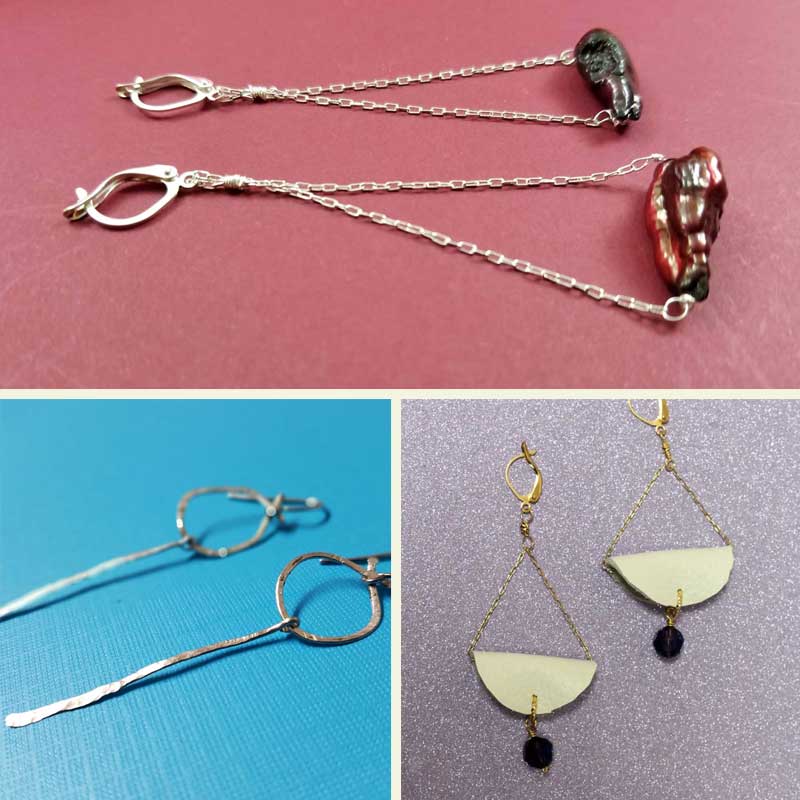 Creative Ideas for DIY Earrings
Boost your earring designs with creative flair. Here are ideas to spark inspiration:
- Paper Earrings: Cut paper into shapes, layer for thickness, and seal with Mod Podge.
- Beaded Earrings: String colorful beads onto wire for simple, elegant looks. Mix sizes for interest.
- Charm Earrings: Add ready-made charms to earring hooks for a quick, cute accessory.
- Feather Earrings: Attach feathers with wire for a bohemian vibe. Choose vibrant or natural colors.
- Fabric Earrings: Use scrap fabric pieces, fold into shapes, and add earring backs.
- Wire-Wrapped Earrings: Twist wire into forms, wrap around stones or beads, and create unique patterns.
- Repurposed Earrings: Take old jewelry parts, combine them, and make something new.
- Minimalist Earrings: Use thin wire to form simple geometric shapes for a modern look.
- Statement Earrings: Craft bold pieces using large beads, chunky charms, or thick wire.
- Nature-Inspired Earrings: Incorporate small shells, stones, or wood pieces with wire.
These ideas are only the beginning. Use your imagination, mix materials and create earrings that showcase your personality. Remember, the best creations often come from experimenting. Try different combinations until you find what fits your style.
How to Finish Your Earrings for a Professional Look
When you have crafted your earrings, the final touches are essential for a polished look. Here’s how to make sure your earrings have a professional finish:
- Inspect the Details: Check for any loose wires or beads. Tighten and secure as needed.
- Smooth the Edges: Use fine sandpaper or a file to smooth any sharp edges on wires or metal pieces.
- Consistent Loop Sizes: Ensure loops are uniform in size by using the same point on your pliers.
- Clean Your Work: Wipe your earrings with a soft cloth to remove fingerprints and any glue residue.
- Quality Checks: Make sure the hooks are well aligned and facing the right way.
- Add Clear Coat: A thin layer of clear nail polish or varnish can protect and add shine.
A little extra time spent on these finishing steps can make a big difference. Your DIY earrings, made at home, will look just as good as store-bought pairs. This attention to detail is what elevates your handcrafted jewelry and makes it stand out.
 Tips for Beginners on Starting Earring Projects at Home
Starting earring projects at home is fun and easy! Here are some tips for beginners:
- Start Small: Pick simple designs for your first projects. Try paper or bead earrings.
- Organize Your Workspace: Keep tools and materials within reach. A tidy space helps you focus.
- Follow Tutorials: Use online guides for step-by-step help. They make learning new techniques easier.
- Practice: Make a few practice pieces. Don’t worry if they’re not perfect right away.
- Choose Quality Materials: Good beads, wire, and hooks make your earrings look better and last longer.
- Be Patient: Take your time with each step. Rushing can lead to mistakes.
- Stay Inspired: Look at different earring styles for ideas. Mix and match until you find what you love.
- Ask for Feedback: Show your creations to friends or family. Use their input to improve.
- Keep Learning: As you get better, try more complex designs. Each project builds your skills.
With these tips, you’ll be making beautiful earrings in no time. Remember to have fun and let your creativity shine!