Introduction to Wrist Measurement
In the quest for the perfect bracelet fit, understanding wrist measurement is key. It’s simple and crucial for ensuring comfort and style. Before you invest in a new bracelet, consider learning how to measure your wrist. A proper measurement allows you to choose bracelets that complement your outfit and don’t slide off or pinch your skin.
Measuring your wrist accurately is the starting point for any bracelet purchase. Whether for fashion, health, or even tech wearables, the right fit matters. It aids in movement and avoids disruptions. This introductory guide is your first step to mastering how to measure your wrist for a bracelet.
We will walk through the entire process, from selecting the right tools to the final interpretation of your wrist size. By following our simple guide, you’ll learn the art of measuring and ultimately know which brace(let size will give you the best fit. Let’s dive in and unravel the method to achieve that seamless bracelet fit.
 Required Tools for Measuring Your Wrist
Before learning how to measure your wrist for a bracelet, gather the right tools. Using the correct tools is critical for an accurate measurement. Here is what you will need:
- Flexible Tape Measure: A tailor’s tape measure is ideal. It bends easily around your wrist, providing an accurate size.
- Strip of Paper: If you don’t have a tape measure, use a strip of paper. Mark your measurement with a pen and then use a ruler to measure the length.
- Ruler: A standard ruler works well with the paper strip method. It helps in gauging the exact wrist size in inches or centimeters.
- Pen or Pencil: Use this for marking the paper. It helps in recording the measurement point with precision.
- Notepad: Jot down your measurements immediately to avoid forgetting them. Accurate record-keeping helps when shopping for bracelets.
Choose a tool that is readily available and easy to use. A flexible tape measure is often the best choice. It allows for a snug fit around your wrist without any gaps. If you’re using a paper strip, ensure it doesn’t stretch. Paper stretching leads to incorrect measurements. Pick a clean, flat surface to lay the paper and ruler on when measuring. With these tools ready, you’re set to measure your wrist accurately.
Step-by-Step Guide to Wrist Measuring
Getting the right bracelet fit starts with a step-by-step guide to measuring your wrist. The process is straightforward and requires attention to detail to ensure accuracy.
Choosing the Right Tape Measure
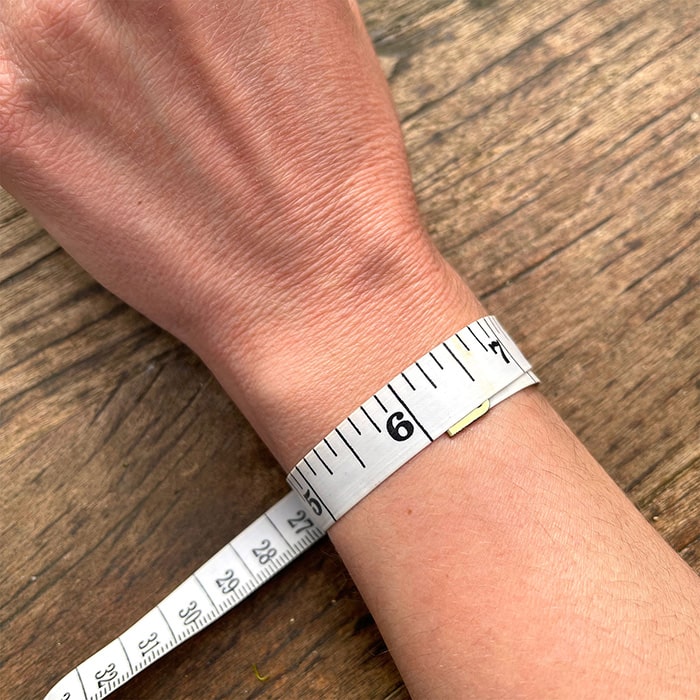
A flexible tape measure is the best choice for measuring your wrist. Select a tape that is clearly marked with both inches and centimeters. This helps whether you are shopping domestically or internationally, as different regions may use different units of measurement. Ensure the tape measure is soft and pliable to contour to your wrist naturally. A stiff tape can give an incorrect size.
Ensuring Accurate Measurement
Start by wrapping the tape measure around your wrist, where you typically wear a bracelet. Place it snugly against your skin without squeezing. The fit should be comfortable, not tight. If you are using a strip of paper, wrap it around your wrist and mark where the end meets. Use a ruler to measure the strip. Whether you’re using a tape measure or a strip of paper, remember to record the measurement as soon as you take it. Double-check the numbers to prevent any mistakes. For the most precise result, measure your wrist twice and take the average of the two measurements.
Tips for Measuring for Different Types of Bracelets
Different bracelet styles may need special attention when measuring your wrist. We’ll look at three popular types. Each demands its unique way of measuring to ensure the best fit.
Bangle Bracelets
Bangle bracelets are firm and don’t wrap snugly around your wrist. To measure for a bangle, position your hand as if slipping on a bangle. Bring your thumb and little finger together. Measure around the hand’s widest part with a tape measure. This ensures the bangle will not be too tight to slip on.
Chain Bracelets
Chain bracelets require a more precise wrist size. Start by measuring your wrist with a tape measure. Then, add half an inch to the measurement. This extra length ensures the chain bracelet drapes nicely, allowing some movement without being too loose.
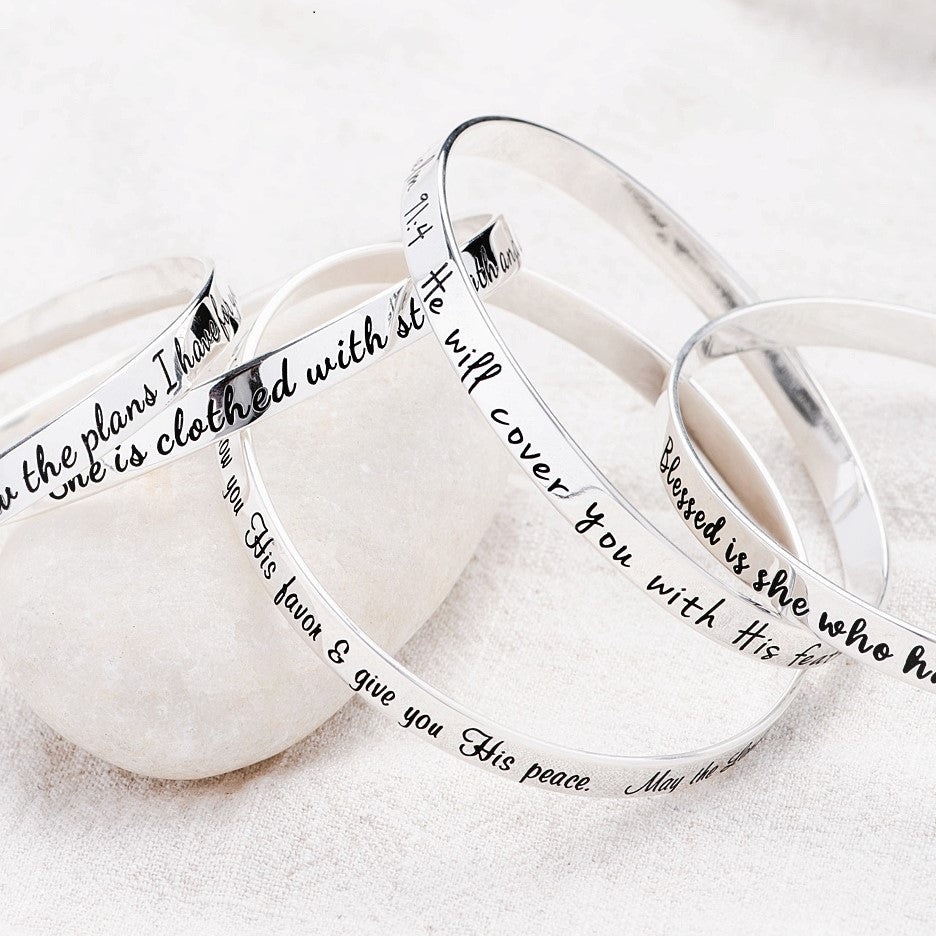
Cuff Bracelets
Cuff bracelets are more rigid and open-ended. Measure your wrist as detailed in the previous sections. Once you have your wrist size, you should not add extra length. Cuff bracelets are worn fitted but have a gap for easy wearing. You want them to stay secure without sliding off.
Adjusting for Comfort and Bracelet Design
When measuring your wrist for a bracelet, comfort is as important as size. Every bracelet design has a different fit. So, you need to adjust your measurement based on the bracelet style you choose. Here’s how to ensure comfort, considering the bracelet’s design:
- Bangle Bracelets: Add a quarter inch to your hand’s measurement. This space allows you to slip the bangle on and off easily.
- Chain Bracelets: The half-inch addition to your wrist size, mentioned earlier, provides a relaxed fit. It stops the bracelet from clinging too tightly and feels comfortable.
- Cuff Bracelets: No extra length is necessary. The gap in the design lets you slide the cuff on with ease. Even so, ensure the bracelet doesn’t tighten too much when worn.
- Beaded or Stretch Bracelets: For these, consider your desired fit. If you prefer it snug, stick to your actual wrist size. For a looser fit, add up to half an inch.
- Leather Straps and Watches: Often, these have adjustable closures. Choose a length that sits comfortably on your wrist where it won’t swing widely or squeeze.
These adjustments help your bracelet to not only fit well but also suit your taste and daily activities. Remember to check the clasp and closure system of the bracelet you are considering. This impacts how easy it is to put on and how secure it will be on your wrist. As for watches, the same rules apply, but be extra mindful of the case size as it can change the fit.
By now, you know how to measure your wrist for a bracelet. You also understand the tweaks needed for different designs. Comfort is key, so take your time to get it right. Your perfect bracelet should be snug enough not to fall off, yet loose enough not to hinder movement.
Interpreting Wrist Measurements
Once you have measured your wrist and noted the figures, it’s vital to understand what they mean. Your wrist measurement is the foundation for picking the right bracelet size. For an accurate fit, interpret the numbers in the context of your preferred bracelet style.
- Exact Size Fit: If the bracelet design requires a snug fit, use the exact measurement of your wrist.
- Loose Fit: For a casual look, consider adding a quarter to half an inch to your wrist size. This offers a comfortable drape.
- Multiple Bracelets: When layering bracelets, you may need extra space. A bit more room prevents a cluttered feel.
When shopping for bracelets, look for size charts. Compare your wrist size to the chart to find the correct bracelet size. If you find yourself between sizes, go with the larger option. It’s better to have a bracelet that’s slightly loose than one that’s too tight.
How to measure your wrist for a bracelet effectively translates to choosing pieces that will feel comfortable and look great on your wrist. Use these interpretations wisely to make smart purchasing decisions and enjoy your bracelets in comfort and style.
Common Mistakes to Avoid When Measuring
While measuring your wrist for a bracelet may seem straightforward, errors can occur. To ensure accuracy, avoid these common mistakes:
- Measuring too tightly: Pulling the measuring tape with too much force will result in a size that’s uncomfortably snug. Keep the tape measure firm but not tight against your wrist.
- Ignoring the closure: Not accounting for the type and size of the bracelet’s closure might lead to a misfit. Consider the closure when deciding on bracelet length.
- Not measuring at the wrist bone: Some people measure above or below their wrist bone. For most bracelet styles, measure directly over the wrist bone.
- Using a non-flexible ruler: A straight ruler can’t replicate the curve of your wrist, leading to inaccurate sizing. Always opt for a flexible tape measure or paper strip.
- Forgetting to add length based on bracelet style: Different styles need different fits. Remember to adjust the length according to the specific bracelet type, such as bangles or chains.
- Taking a single measurement: Wrists can swell at different times. Measure a couple of times throughout the day and use the average size for the best fit.
By steering clear of these errors and sticking to the recommended methods, you’ll achieve a more accurate and comfortable bracelet fit.
Final Thoughts on Perfect Bracelet Sizing
After walking through the essentials of how to measure your wrist for a bracelet, it’s clear that precision and attention to detail are vital. Remember, your comfort is just as important as the size. Every bracelet style may require a slight adjustment in measurement for that ideal fit. Even when two bracelets seem similar, tiny differences in design can change how you should measure.
Keep in mind the tools you use. A flexible tape measure or strip of paper can help you get the closest to an accurate size. Note down your numbers right away and check them twice to avoid any future disappointment.
If you buy bracelets online, use your precise measurements against their size charts. This can save you time with returns or exchanges. If in-between sizes, choosing the larger one often works best. It’s easier to adjust a bracelet that’s slightly bigger than to stretch one that’s too tight.
Layering bracelets? Make sure you account for extra room so that they can move freely. This ensures comfort and a stylish look.
Lastly, practice makes perfect. The more you measure, the better you’ll become at getting that perfect bracelet fit every time. So, take your time, measure with care, and soon you’ll wear your bracelets with confidence and ease.