Introduction to Yarn Bracelets
Yarn bracelets are a charming way to accessorize or give a handmade gift. Simple yet versatile, they offer endless possibilities for creativity and personal expression. Perfect for crafters of all ages, these bracelets can be made with materials you likely have at home. Whether you’re a seasoned crafter or a beginner, learning how to make a yarn bracelet is a fun and rewarding project.
In this guide, you’ll discover the ease of creating your very own yarn bracelets. We’ll cover everything from selecting the right materials to mastering basic techniques. Plus, we’ll explore ways to add unique touches to your creations. Whether for yourself, a friend, or as a fun activity with kids, yarn bracelets are a delightful craft to explore. Let’s weave some creativity and make something beautiful together!
 Essential Supplies Needed for Yarn Bracelets
To start making yarn bracelets, you need a few basic supplies. Gathering your materials beforehand ensures a smooth crafting process. Here’s what you’ll need to begin your bracelet-making adventure.
Choosing the Right Yarn
The type of yarn you choose can affect the look and feel of your bracelet. For a sturdy bracelet, go for a thicker yarn. Multicolored yarn adds a fun twist without needing multiple yarns. For a finer, delicate bracelet, embroidery floss is an excellent choice. It comes in a variety of colors, letting you mix and match as you like.
Crafting Tools for Yarn Bracelet Making
Beyond yarn, a few tools can help you craft your bracelet. A cardboard circle, about 5-6 inches in diameter, acts as your loom. Scissors are needed to cut the yarn and make the cardboard loom. Finally, a ruler might come in handy to measure out your yarn. With these supplies, you’re ready to begin making your own yarn bracelets.
The Basic Technique of Yarn Bracelet Making
Creating a yarn bracelet involves a simple technique that anyone can learn. With the basic steps outlined below, you’ll soon be crafting beautiful bracelets.
Set Up Your Workspace
Before you begin, organize your space for an easy crafting experience. Clear a table and gather all your supplies. Make sure you have good lighting, so you can see your work clearly.
Step-by-Step Crafting Process
- Cut your cardboard: Shape a 5-6 inch circle from cardboard to use as a loom.
- Make a hole and notches: Punch a hole in the center and cut 8 evenly spaced notches around the edge.
- Prepare your yarn: Tie 7 strands of yarn together and thread the knot through the hole.
- Secure the yarn to the notches: Place each strand into a notch, leaving one empty.
- Start braiding: Count three notches from the empty space, move that yarn to the empty notch.
- Keep the pattern: Repeat the braiding, always counting three notches from the new empty space.
- Finish the bracelet: Once you reach the desired length, remove the yarn from the notches and tie off the bracelet.
Follow these steps, and you will have a handcrafted yarn bracelet to wear or share. It’s a rewarding craft you’ll want to make again and again.
Creative Variations of Yarn Bracelets
Crafting yarn bracelets is not only about following steps. It’s about making something unique, that reflects your style and creativity. You can change up these bracelets in many ways, using different colors and textures, or by adding beads and embellishments. These variations allow you to personalize your bracelets, making them perfect for you or as a customized gift for someone else.
Experimenting with Colors and Textures
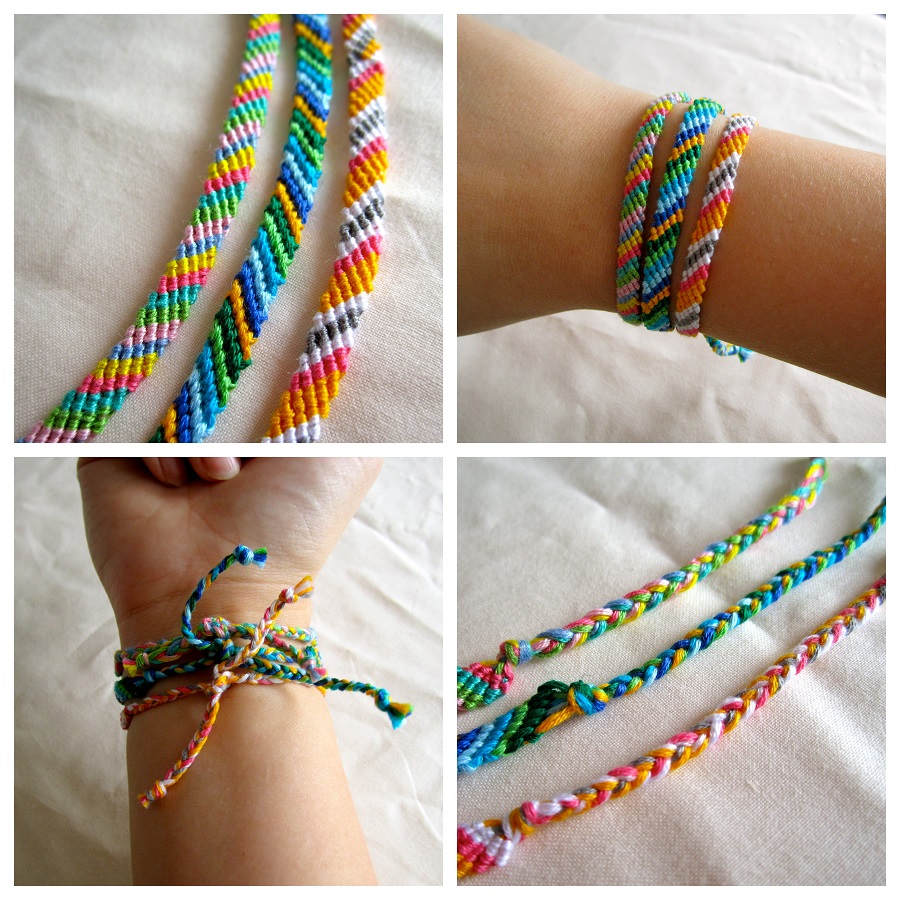
To start, think about color. Choose bold yarns for a statement piece, or soft, pastel colors for something subtle. Mix and match different colors to make a pattern. You can also combine yarns with different textures. Try using one strand of glittery yarn with plain yarns for a sparkle effect.
Textures add depth to your bracelets. Mix smooth with fuzzy yarn, or thick with thin. The way the different textures feel and look can turn a simple bracelet into something special.
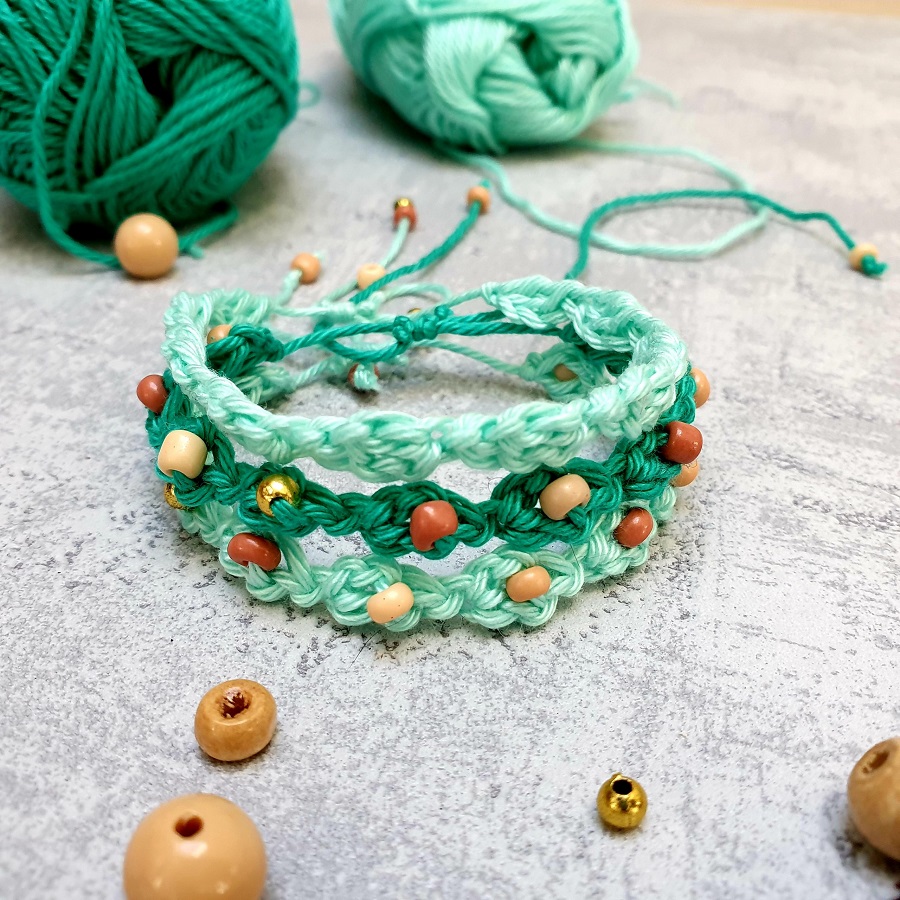
Adding Beads and Embellishments
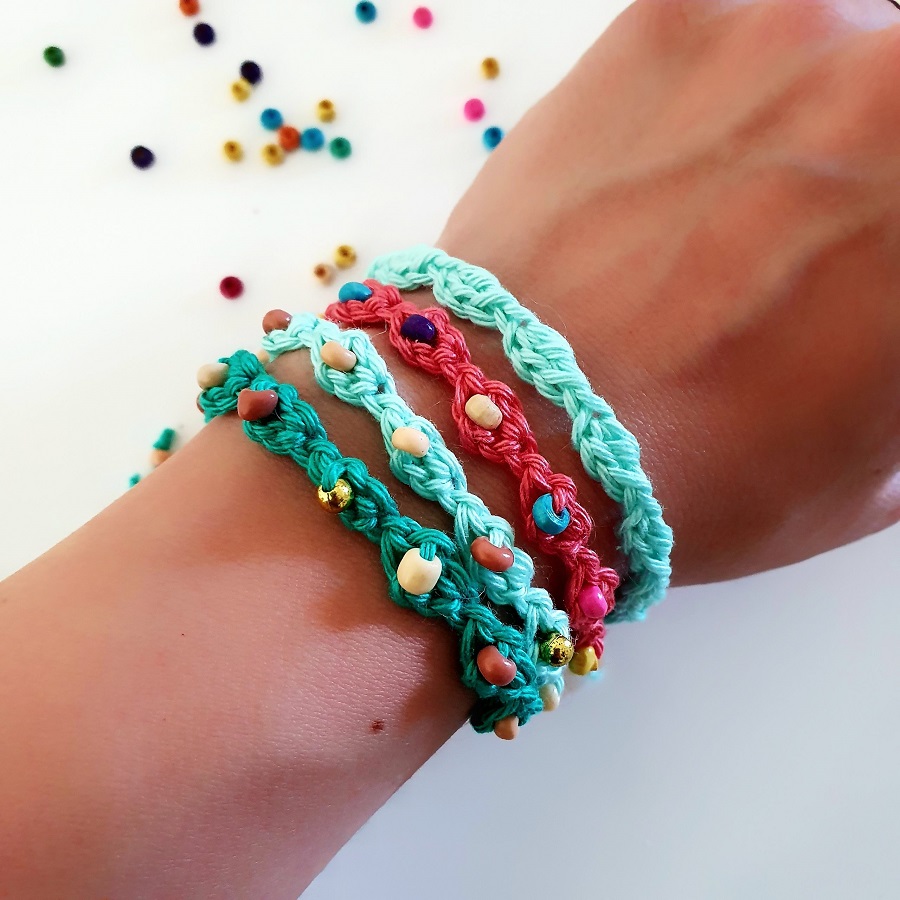
Beads are a great way to add a twist to your yarn bracelets. Choose beads that slide easily onto your yarn. Place beads at even intervals for a patterned look, or spread them randomly for a more casual style.
You can also add charms or buttons for a personal touch. They can reflect your hobbies, favorite animals, or anything else that’s meaningful to you. When you add these elements, your yarn bracelet becomes more than just an accessory; it tells a story.
Remember, the key is to have fun with it. Don’t be afraid to try new things and be bold with your choices. Your yarn bracelet is a reflection of your own creativity.
Tips for Perfecting Your Yarn Bracelet
Crafting a yarn bracelet is quite straightforward, but achieving a polished look requires attention to detail. Here, we will share some tips to help you perfect your yarn bracelet with even tension and professional finishing touches.
Ensuring Even Tension and Knots
Maintaining consistent tension is key to a neat bracelet. Pull each yarn with the same force when making knots. Uneven tension can make the bracelet twist or curl. A tight knot secures the yarn, but don’t over-tighten. This could stretch the yarn and distort your bracelet. When you braid, keep a steady rhythm. This helps you stay consistent with tension and knots. As you work, pause often to check the tension. Adjust any strands that are too loose or too tight.
Finishing Touches for a Professional Look
Once your bracelet reaches the desired length, it’s time to complete it. Trim any excess yarn after tying the final knot. Leave just enough yarn to make a clean, small knot. Consider adding a bead or button as a closure for style and function. Tuck in stray ends or apply a drop of fabric glue to seal knots. For a sleek look, pair your yarn bracelet with clasps or crimps. This gives a secure and elegant finish. Finally, present your bracelet nicely. Curl it gently around your wrist or a bracelet display to showcase its shape.
By following these tips, you’ll craft a yarn bracelet that not only looks beautiful but also stands up to wear. Remember, practice makes perfect, so keep crafting and refining your technique.
Fun Projects for Kids and Beginners
Yarn bracelets are perfect for beginners and a hit with the kids. They’re simple, fun, and spark creativity. Let’s look at two ways to make the crafting journey enjoyable for our young friends and crafting rookies.
Crafting with Kids: Making the Experience Fun
Making yarn bracelets with kids is about fun and learning. Choose bright, colorful yarns to catch their eye. Let them pick colors to stir their excitement. Use bigger beads for easy handling and a touch of whimsy. Demonstrate slowly, step by step. Cheer them on as they learn. Counting notches and strings is also educational. For the finale, wear your bracelets together, creating a special memory.
Beginner-Friendly Yarn Bracelet Designs
Start simple. Single-color bracelets teach the basics without complexity. Stripe patterns are a good next step; they’re just as easy but look a bit fancier. Introduce different textures once they’re confident with simple patterns. Remember, the key is to build skills gradually while keeping it fun and satisfying. Every finished bracelet is a win and a confidence boost!
Advanced Yarn Bracelet Techniques
Once you’ve mastered basic yarn bracelet crafting, it’s time to explore advanced techniques. These methods can transform your creations into intricate, eye-catching pieces. It’s where your skills really flourish, adding more complexity and uniqueness to your bracelets.
Introduction to Kumihimo Braiding
Kumihimo braiding is a Japanese technique that dates back centuries. It’s a form of advanced braiding that creates strong, beautiful cords. These can then be turned into stunning bracelets. Kumihimo often uses a disk, which guides the threads in a specific pattern. To start, you need more than seven strands of yarn or cord. The more strands you use, the thicker and more intricate your bracelet can become. This technique might seem daunting at first, but with practice, you’ll quickly get the hang of it.
Practicing kumihimo braiding leads to endless possibilities. You can create patterns, spiral designs, and even integrate beads for added flair. It’s a step up from simple braiding and can be quite meditative once you learn the repetitive motions.
Challenging Patterns for Experienced Crafters
For those ready to take on more complex designs, the options are truly limitless. Experiment with different knotting techniques like macrame or try creating wave patterns, chevrons, and gradients. Each pattern requires careful planning and execution.
Work with a variety of yarns or embroidery floss to see how each affects the design. Introduce specialty threads like metallic or variegated to push your designs further. Those who have mastered tension and symmetry in their work can delve into creating intricate designs that are symmetrical or feature clear geometric patterns.
Don’t hesitate to refer to tutorials initially, as they can guide you through new patterns. However, encourage yourself to experiment and create your own unique designs once you’re comfortable with the techniques.
By advancing your skills, you unlock new opportunities to express your style through your bracelets. So keep practicing, challenging yourself, and most importantly, enjoying the craft of yarn bracelet making.
Conclusion: Unleashing Your Creativity
Crafting yarn bracelets is more than just a pastime. It’s a way to express your unique style and creativity. As you’ve learned in this guide, starting with a simple braid and advancing to more complex patterns like kumihimo, your crafting can grow just as your skills do. Remember, every twist, every color choice, and every knot is a reflection of your personal touch.
Put your new-found skills to use and create bracelets that reflect your mood, match your outfit, or even convey a message. The beauty of yarn bracelets is in their versatility and the personal connection they can carry. Whether shiny and bold or soft and subtle, each bracelet tells its own story. Encourage experimentation, mix different textures and patterns, and don’t shy away from adding elements like beads or charms that have a special meaning.
By perfecting the technique of making yarn bracelets, you’ll not only enjoy the process but also take pride in the final product. Don’t forget to share your creations with friends and family, or perhaps, start your own small craft business. The possibilities are truly endless.
We hope this guide has inspired you to get started and unleash your creativity. Every bracelet you make is a masterpiece waiting to be worn or given away. So, gather your materials, burst with ideas, and craft away!